Output

Channel
If you check this box, a drop-down menu will appear with the names of other channels. This allows you to choose another channel as destination rather then a folder.
Send to FTP destination
Use a destination folder on an FTP server. The destination folder is now regarded as folder on the ftp server rather than locally. If checked, further options become available:
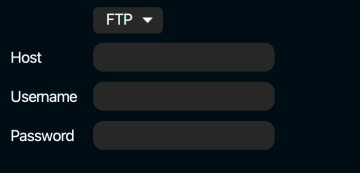
FTP:
Normal ftp with password authentication
SFTP Password Authentication:
sftp with password authentication
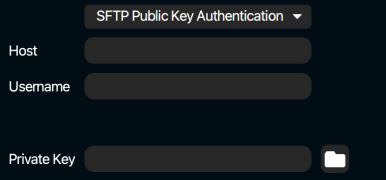
SFTP Public Key Authentication:
sftp with RSA public key authentication (see screenshot below for example settings)
Host name
Name of the ftp server or ip address. (I.e.: ftp.myftpserver.com).
Username
User name to logon to the FTP server
Password
Password to logon to the FTP server (only available with ftp or sftp with password authentication)
Private Key
Path to the private key on the Pixometry server, that Pixometry will use to authenticate on the SFTP server. (Only available with SFTP with public key authentication).
Local destination
This checkbox allows you to connect a local folder to the cloud based channel as output. Create a Workflow for this.
File format
Choose the desired output file format from the drop-down menu. “Original” keeps the file format of the original image. If the original is a PDF file, the output is always PDF as well, regardless of what is specified here.
JPEG quality
Choose the jpg quality/compression level. 10 represents the least compression and maximum quality, 1 represents the maximum compression at the cost of a lower quality. Read more about file sizes.
PSD / TIFF options
Read “PSD Support“.

Keep original layers
By default you get only an enhanced image in your output PSD or TIFF. By checking this option you actually keep the original layers in the output file.
Only if layers contain alpha / mask channels
Only keep the original layers in the output file if these layers contain alpha or mask channels.
Original as layer
Keep the image that was used as the original (by default this is the compatibility layer, see “PSD support“) as a layer in the output file.
With name
By default the name of the layer is “Pixometry original”. This can be changed.
Processed as layer
If you have default settings, this option is not checked. This may seem strange, as you always want the processed image as a layer right? But if the file has only one layer, this can be in the image as compatibility layer. Only if you keep the original layers, you need to add the processed as layer as well, otherwise you see only the original.
With name
By default the name of the layer is “Pixometry processed”. This can be changed.
Add compatibility layer
Add the compatibility layer, as Photoshop does by default. It can be used by third party applications to display a preview.
Preserve Alpha / Mask channels
Keep Alpha and Mask channels
Layer compression
Choose between RLE and ZIP. RLE is the default.
Add mask from Alpha channel
Create and add a mask out of Alpha channels.
XMP options
Pixometry can add XMP metadata to processed images. A new namespace will be added to XMP metadata: “http://www.elpical.com/claro/synt1.0/”. XMP information can later be used to route images for example.

Add XMP channel settings
You can review the channel settings that where used for the image by checking the XMP metadata.
Add XMP Logging
Add Pixometry logging to XMP for later review.
Add XMP Inspector
If Photoshop Inspector was used in the workflow, you will be able to see who opened the image in Inspector and is responsible for approving the final result. It is the account-name that was used to login on the workstation where Inspector was used.
Add XMP Tiff properties
Add technical tiff properties related to image size to the XMP metadata. The name “tiff properties” is a bit confusing in the XMP specification as it it not only for Tiff files. Some applications use this metadata to determine the size of an image.
File name prefix
Add a prefix to the filename.
File name extension
Pixometry will use the correct extension based on the selected file format. See also the next option. This field allows to override the extension, and possibly add a file name suffix. For example: “_pixometry.jpg”. Use this only if a fixed output file format such as jpg has been chosen.
Add extension if original image has none
By checking this option there will always be a file name extension, also if the original image has none.
Use file name suffix for grayscale images
File name suffix that will only apply to grayscale images
Use unique file names on output to avoid overwriting
If a file is to be written to the output folder but a file with the same name already exists there, the file name will get a numbered suffix to avoid overwriting of the file that was already there.
Mirror input subfolders
If a folder (structure) containing images is written to a channels’ hotfolder, the folder structure will be recreated on the output side.
Copy original to folder
Make a copy of the original image and save it to the folder you can select here.
Use file name suffix if copying original images
By adding a file name suffix to the original image you can actually choose the same output folder as is used for the processed images (destination folder).
Advanced settings
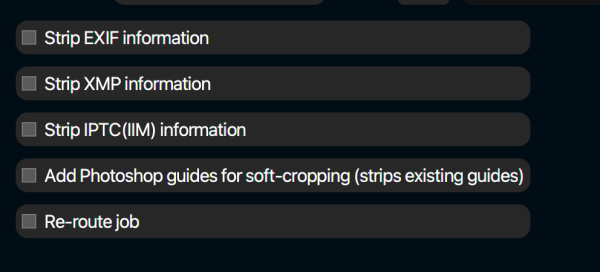
Strip Exif information
Remove the Exif (Camera metadata) information from the processed image.
Strip XMP information
Remove the XMP metadata from the processed image
Strip IPTC (IIM) information
Strip the IPTC information from the image. This is only the IPTC data stored according to the IPTC’s organisation’s Information Interchange Model. Today, IPTC is also stored inside XMP.
Add Photoshop guides for SoftCrop and strip existing guides
If jobtickets are used, a soft crop may be specified. That is an area of the image that is important for image analysis and optimization but the image will not actually be cropped. Photoshop guides maybe added to the image so that Photoshop can display the soft crop area.
Re-route job files
If checked, the parameters of the jobticket will not be applied in this channel. Instead, the jobticket and image will be routed to the selected output.