Workflow
Pixometry allows for automatic flows (from input to output folder without human intervention), semi automatic workflows (send problem images to Inspector) or a workflow where all images need to be approved using Inspector.

Above is a screenshot of the Workflow settings of a processing channel. It starts with a drop-down menu of the main workflow options. The contents of the drop-down menu can be seen in the screenshot below. After that an explanation of the options.
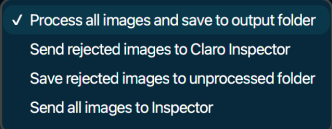
Process all images and save to output folder
This is a fully automatic workflow. Images will be taken from the input folder, processed and written to the output folder.
Send rejected images to Photoshop Inspector
This is a semi automatic workflow. It means that based on image analysis in combination with Quality Check settings, problem images will be detected and send to the Photoshop Inspector queue for approval. All other images are processed and send to the output folder.
Save rejected images to unprocessed folder
This is a semi automatic workflow. It means that based on image analysis in combination with Quality Check settings, problem images will be detected and send to the folder for unprocessed images. All other images are processed and send to the output folder.
Send all images to Inspector
All images are enhanced and then send to the Photoshop Inspector queue.
Folder for unprocessed images
Often referred to as “the bad folder”. Files that won’t process correctly (i.e. because they are corrupted or of an unsupported file format) will be sent to this folder. Also, if images are rejected and the workflow option “save rejected images to unprocessed folder” is selected, those images end up in this folder.
Mirror input subfolders
If a folder (structure) containing images is written to a channels’ hotfolder, the folder structure will be recreated in the folder for unprocessed images.
Apply output conversion before Inspector
For original images
If checked, the original image as displayed in Photoshop Inspector is already converted to the output colorspace. If unchecked, the original image is still in its original colorspace. Conversion will be done after the Inspector approval.
For processed images
If checked, the processed image as displayed in Photoshop Inspector is already converted to the output colorspace. If unchecked, the processed image is still in the working RGB colorspace in which it was enhanced. Conversion will be done after the Inspector approval.
Email on failure
This allows you to let Pixometry send an email to a specified address if an error has occurred during processing. Files that won’t process correctly (i.e. because they are corrupted or of an unsupported file format) will trigger this email. The email is NOT triggered if an image is rejected based on quality (Quality Check settings). That is a normal part of the workflow. Note: to be able to send emails, Pixometry needs an SMTP server. The SMTP server must be specified in Maintenance settings. (see: Maintenance and system settings)
To address
Email address to send the error-report-email to
From address
Email address that the recipient sees as the sender address.
Workflow advanced settings
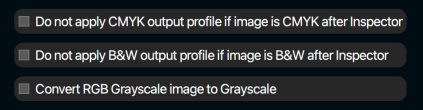
Do not apply CMYK output profile if image is CMYK after Inspector
If checked: If the conversion to the output colorspace is set to happen after Inspector, but the Photoshop Operator converts the image to CMYK in Photoshop, then the output profile as set in the OUTPUT CONVERSION settings will not be applied anymore.
Do not apply B&W output profile if image is B&W after Inspector
If checked: If the conversion to the output colorspace is set to happen after Inspector, but the Photoshop Operator converts the image to B&W in Photoshop, then the output profile for B&W images as set in the OUTPUT CONVERSION settings will not be applied anymore.
Convert RGB Grayscale image to Grayscale
An image may appear to be grayscale visually, without color, but still be encoded in RGB mode. With this option, such images can be recognised and converted to real grayscale.