Setup JobClient preferences.
Locate the preferences window. In the Indesign Window menu, Claro Jobclient, ClaroJC preferences.
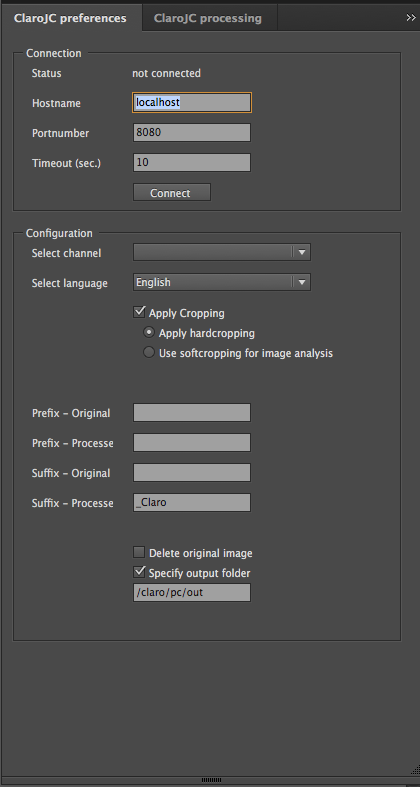
The preferences window:

The preferences pane consists of two parts. The upper part is about the connection settings. We discuss those in Installation of JobClient. Here we explain the Configuration part of the preferences.
Select channel
Select one of the channels that have been created on the server from the drop-down menu. Images will be processed according to the settings of that channel.
Select language
Select the language of the user-interface of the JobClient.
Apply Cropping
If this option is checked and if images are only partly visible in the document (cropped) then the crop coordinates will be passed on to Pixometry. Pixometry will use the crop-coordinates in one of two ways:
Apply hardcropping If checked, Pixometry will actually crop the image, and only the visible part of the image will remain. Therefore, after the image in the document is updated with the processed version, the image will fit the picture box exactly.
Use softcropping for image analysis If checked, Pixometry will use the crop-coordinates for image analysis only. The visible part of the image is analysed, and corrections are based on that analysis. But the complete image will be processed and sent back.
Rename images
Unless a different output folder is specified, or the delete original image checkbox is selected, it is necessary that images are renamed. The processed images will be placed in the same folder as the original. You can choose to add a prefix or suffix to the original and/or processed images.
Delete original image
The original image will be deleted.
Specify output folder
If this option is not checked, the processed image will be placed in the same folder as the original. If checked, the output folder will be used as specified in this field.