There are two modes in which you can work with Inspector. The first is from the main (small) window, the second is from the Queue window.
Main Inspector window
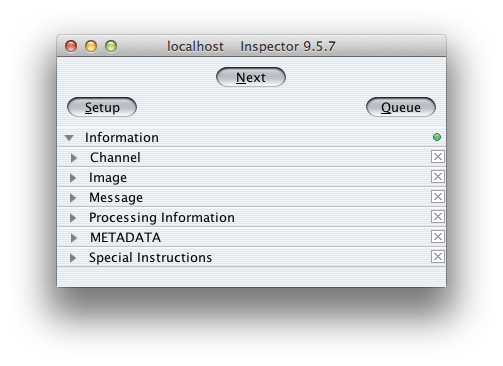
This is the main inspector window. There are 3 buttons. First is “Setup”. See Inspector configuration for the functionality behind the “Setup” button. Second is the “Next” button. If the “Next” button is active and blinking red, there are images waiting in the Inspector queue. If there are no images in the queue, the button is inactive and greyed out. The third button opens the Queue window.
There are a number of information fields below the buttons that show information on the processed images once they are opened in Photoshop.
To open the next image from the queue, click the “Next” button. Below is a screenshot of the result. Both the original as well as the processed image are opened in Photoshop and shown side by side (tiled).
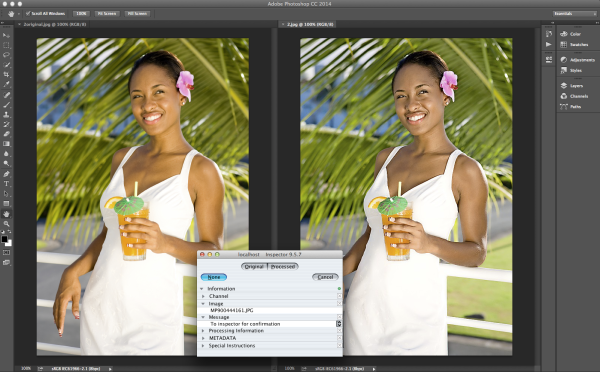
The original image is on the left, the processed on the right, as you can also see from the file names that the images have in Photoshop: 2original.jpg and 2.jpg. The number is an internal ID number. The real file name of the image as it was in the input folder is visible in the Inspector window, in the “image” information box as shown in the screenshot above. There are a number of information fields available:
Channel: Name of the channel that processed the image;
Image: File name of the image;
Message: Inspector message: “To Inspector for confirmation” means that there were no specific quality warnings, but the image was send to Inspector because the setting in Workflow settings of the channel was to “send all images to Inspector”. It might also display quality warnings like “noisy image”.
Processing information: Pixometry log info
METADATA: the default metadata that gets displayed in Inspector: the caption of images (IPTC metadata).
Special instructions: This is a custom metadata field that has been configured to be displayed in Inspector. See Inspector configuration on how to do this.
Next step is to approve an image and send it back to Pixometry to finish the workflow. If the processed image is fine, then simply click the “Processed” button. Both images close, and the processed image is sent back to Pixometry. It is also possible to tweak the processed image while it is open in Photoshop before clicking “Processed”. Clicking “Processed” triggers a save & close action in Photoshop. If the processed image is not satisfactory it is also possible to tweak the original image in Photoshop manually and then click “Original”. That will send the manually tweaked original image back to Pixometry. The “Cancel” button will close the images without saving them, and the images will still be in the Inspector queue. Using “None” means that both images will be deleted from the Inspector queue, and none will be send back to Pixometry to finish the workflow. It requires confirmation before it will actually do this. The “None” button may not be available, for instance if the image is from a PDF file. Deleting such an image would mean that the PDF will never get finished.
Working from the queue Queue window
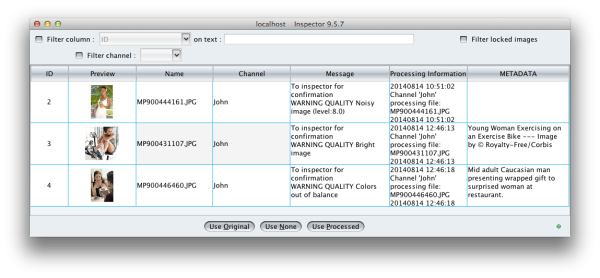
The queue window has a few additional options that are not available in the main window. The most obvious is that it shows all of the images that are in the Inspector queue, and that it shows thumbnails of the processed images. It shows the same information fields as the main window does. The queue window allows you to drag & drop columns to change the sequence in which they are displayed. Clicking on a column header sorts the queue based on the contents of that column (alphabetically). You can also select one or more images in the queue and click “use original”, “use processed” or “use none”, effectively applying that action on all selected images in the queue without opening them in Photoshop first. One reason to do this might be that time ran out to open each individual image in Photoshop. Above the columns, there are various options to filter the queue and show only unlocked images, only images from a specific channel, or images with a certain information in one of the columns. Opening an image in Photoshop is done by double clicking the thumbnail.