COURSE NAVIGATION
- ▶ Pixometry
- ▶ What is Pixometry?
- System requirements
- Access to network folders
- Installation
- ▶ General user-interface navigation
- ▶ Channel types
- ▶ Settings image processing channel
- ▶ Settings of a cropping channel
- ▶ Settings of a routing channel
- ▶ Settings of a Device Link channel
- Workflows
- ▶ Photoshop Inspector
- ▶ Indesign JobClient (Plugin)
- ▶ Support
- ▶ Tips & Tricks
- How to upgrade from previous versions
- Google Vision API configuration and use-cases
- Cropping Channels
- Best practices to tune enhancement settings
- Processing CMYK images
- Camera RAW file support
- Processing PDF files
- Check if images are already processed
- XMP routing
- To resample or not to resample
- File sizes
- PSD Support
- Understanding File Ready Delay and Its Impact on Processing Time
- ▶ Pixometry Integration options
- XML Jobtickets
- Image node tag definitions (the only mandatory node!!)
- Input node tag definitions
- Size node tag definitions
- QualityCheck node tag definitions
- Workflow node tag definitions
- PDF node tag definitions
- GrayscaleConversion node tag definitions
- ImageEnhancement node tag definitions
- IPTC node tag definitions
- JobControl node tag definitions
- Output node tag definitions
- ▶ Pixometry Imagin
- ▶ Pixometry (on prem edition)
- ▶ What is Pixometry?
- ▶ System Requirements
- ▶ Installation and registration
- Start the user-interface
- ▶ General user-interface navigation
- ▶ Channel types
- ▶ Settings image processing channel
- ▶ Settings of a cropping channel
- ▶ Settings of a routing channel
- ▶ Settings of a Device Link channel
- ▶ Settings of a Purging channel
- ▶ Multi-server setup (cluster)
- ▶ Photoshop Inspector
- ▶ Indesign JobClient (Plugin)
- ▶ Working with licenses
- ▶ Support
- ▶ Tips & Tricks
- How to upgrade from previous versions
- Google Vision API configuration and use-cases
- Cropping Channels
- Best practices to tune enhancement settings
- Processing CMYK images
- Camera RAW file support
- Processing PDF files
- Tuning performance and memory settings
- Setting up a one2many workflow
- Check if images are already processed
- XMP routing
- To resample or not to resample
- File sizes
- PSD Support
- Restore backup database
- Firewall settings for Pixometry cluster
- ▶ Pixometry Integration options
- XML Jobtickets
- Image node tag definitions (the only mandatory node!!)
- Input node tag definitions
- Size node tag definitions
- QualityCheck node tag definitions
- Workflow node tag definitions
- PDF node tag definitions
- GrayscaleConversion node tag definitions
- ImageEnhancement node tag definitions
- IPTC node tag definitions
- JobControl node tag definitions
- Output node tag definitions
From your search results you may select one or more assets to perform tasks like editing metadata, adding them to projects, exporting them, downloading them, drag 'n drop them.
To drag 'n drop an asset unto another application like Indesign, you can drag the preview and it will drop the original asset. To do this, hold the CTRL key while you drag and drop.
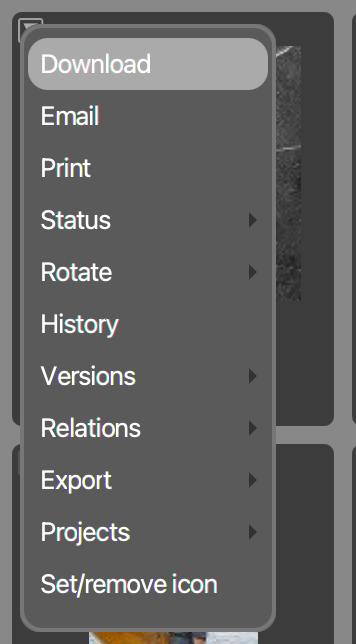
To perform tasks on a single asset, you can use the thumbnail menu. It opens if you click on the little triangle in the top right of the thumbnail.

Which options you have depends on the configuration of Pixometry Imagin in your organisation, and may be different from the options seen here.
To perform a task on multiple assets at once, you can select the assets and then use drag 'n drop unto one of the four dark gray bars shown below.
![]()
Dragging them unto "Queues" will allow you to drop the selected thumbnail unto one of the available exports. Which exports are available depends entirely on the configuration of Pixometry Imagin for your organisation.
Dragging them unto "Projects" will allow you to drop the selected thumbnails unto one of your projects. The action will add the selected assets to the project.
Dragging them unto "Status" will allow you to change the status, for example from "new" to "protected".
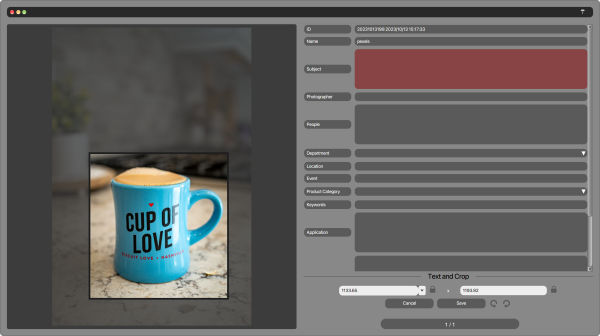
Dragging them unto "Edit" will allow you to edit metadata and change dimensions and create a crop frame (images only).
