What we mean by a one2many workflow is a workflow that produces more than one variant of each original file. For example, a high-res CMYK print version as well as a low-res RGB web-version. Maybe you also need a B&W version, or different sizes for electronic publishing on tablets and smartphones.
A one2many workflow can be easily achieved using routing channels. Read also “Settings of a routing channel” for a complete explanation of all available settings in a routing channel. On this page, we specifically look at setting up a one2many workflow.
The first step is to create the processing channels, that create all of the versions that you need. I.e., setup a processing channel that produces a high-res CMYK file and a channel that produces the web version. Lets call those channels “Print” and “Web”.
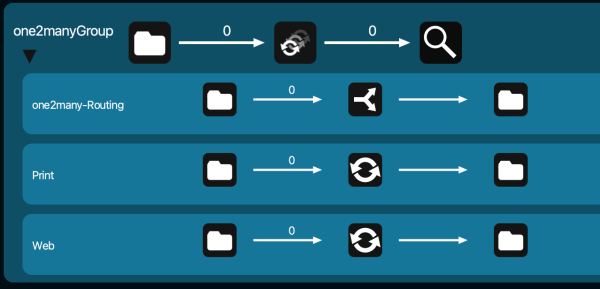
Next step is to setup a routing channel. The hot-folder of that routing channel is the entry point for the files into the Pixometry workflow. In our example, I created a channel-group to have good overview. See screenshot below.
In the routing channel, setup the input folder, but do not specify any conditions. Simply go to the ELSE settings right away.
Select both the “Web” and “Print” channels. See screenshot below:
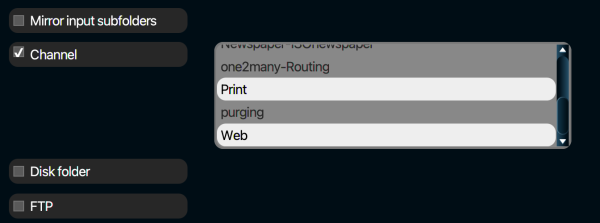
Both the “Print” as well as the “Web” channels are selected. More than two channels is also entirely possible. Select multiple channels by holding down the ctrl-key (Windows) or the CMD key (Mac OSX).
You can let the Web and Print channel output to different folders, or to the same folder. In that case, choose to add a prefix or extension to the files so they do not overwrite each other in the output folder, and are recognisable too.